Create a Bookable Product
In this section, we will cover how to create a bookable product and how to utilize all the features available to you when you create a product.
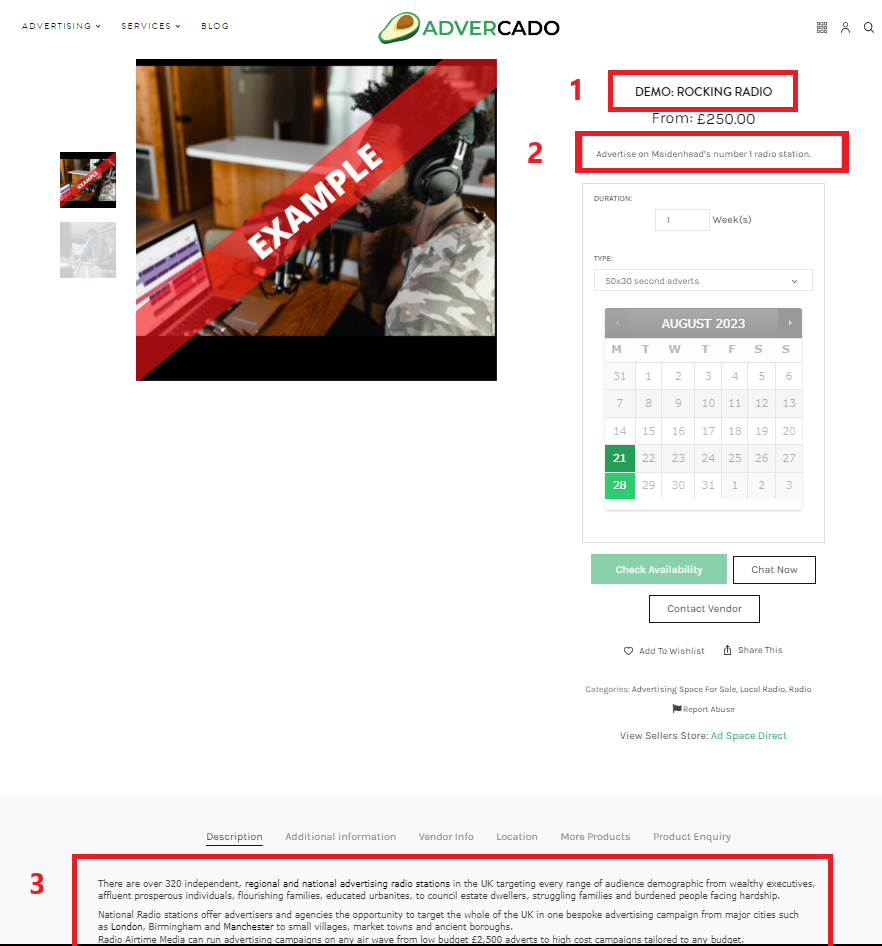
Booking Product Page
Your vendor dashboard provides you with access to the bookable product page. You can create and manage all of your bookable products here. You can see the status of your products, their SKU numbers, and whether they are in stock, as well as the current price, all in one place.
The tabs at the top of the page give you access to your bookings, calendar and resources.
TIP: If you have several similar products, you can save time by duplicating, editing, and renaming a previously created product.
Creating a Bookable Product
A bookable product is a product with limited availability that is purchased in blocks of time. Customers use a calendar on your product page to book your products.
To create a new bookable product:
- Head to your vendor dashboard
- Select ‘Bookable Products’
- Select ‘Add New Bookable’ product on the top right of the screen
PRO TIP: If you are creating multiple similar products, use the duplicate option to save time, then edit the details.
* How your details will appear on the product listing
Description
1. Title
What is the name of the product you’re selling? This is the name that will appear in search results, so make it descriptive and interesting.
Category
We split categories between advertising spaces and advertising services. Be sure that your group product is in the right category or your customers could miss it.
Product Range (Nearest Thousand)
It is important for your customers to know the reach of your products. That is why we ask vendors to enter the number of impressions (views/engagement with the product) they expect their space or service to receive.
Enter the number of impressions you estimate your space can deliver per week. How many impressions do you expect to achieve?
Images
Upload a cover image of your group product. This is the image that will appear in the search results for your listing. Use the plus sign (+) to add more images to your listing. Remember that your listing’s photos are the first thing that customers will see, so include high-quality images that will help sell your product.
2. Short Description
Add a concise description that will appear on the top of your product page.
3. Description
Here you can provide more information about your group product, your company, and what you offer. Provide as much detail as possible about your products and services so that customers know exactly what they’re getting.
Geolocation
Now let’s set the product’s location.
- By default, this is set to same as store.
- If your product is not in the same location as your store, uncheck the box and set your product location.
- An accurate location is important to ensure your customers can find your spaces and services easily on Advercado. Use the map to pinpoint the exact location of your product.
Listing Specifics
You can create complex bookings at Advercado that cater to any business needs. We have limited the standard settings to one week (7 day) bookings so you can easily get up and running. The advanced settings give you further flexibility when creating bookings. We encourage you to read through all the booking documentation before you attempt to make complex bookings.
Booking Duration
This field allows you to choose the minimum bookable duration of your advertising space or service. Think of it as setting a time limit for your bookable product. We refer this duration to as a ‘block’.
Example: If you don’t want to change an advertisement any more than once a week, your block duration would be 7 days.
Choose between:
- Customer defined – The customer can define the start and end date of the booking duration on the calendar
- Fixed blocks – You define the start and end days, for example; one week bookings that start every Monday
Minimum & Maximum Duration (Customer Defined)
What are the minimum and the maximum number of blocks your customers can book? Simply change these values to suit your needs.
Attributes
We use attributes to help customers filter through products in the product search. Attributes are characteristics and features of your products.
For example, if you are listing a poster, you may choose the poster size and poster material attributes.
- Open the attribute drop down list
- Select the applicable attribute(s) for your product from the list and click add attribute
- In the value field, select the values that apply to your product
- Once you have added all your attributes, click Save attribute
NOTE: You can use more than one set of attributes if required.
Availability
This is where you define your product availability.
What is a Block?
Bookable products are not like regular products. They are time-dependent, subject to maintenance, and rarely have any shipping. A block is the minimum unit of time which you are making your product available for booking. The default block is 1 week (7 days), however if you change this, you will create a different block value.
Max Bookings Per Block
This is the number of bookings available to book at the same time (block).
For example, if your shop window has space for four posters, and you sell them separately, the max bookings per block would be four. If a customer wants to buy all 4 poster spaces in one block, these would be 4 separate bookings.
Buffer Period
The buffer period is the time you need between bookings to put up or complete your maintenance. By default, we set this to 0, but enter your values here to apply buffering between bookings.
For example, if you need 1 day to take down and repost a billboard, you can have this day as your ‘Buffer Period’ when no bookings can be made.
Restrict Start & End Days
This option is great if you sell advertising space and want to specify the start or end days for your bookings.
To restrict selectable days:
- Tick ‘Restrict start and end days’
- Select the day (s)

Now the 1 week (7 day) block is only available to be booked with a start day of Monday or Friday. This does not affect availability; other days are still available, but they cannot be selected as the start day for that booking.

NOTE: If you remove start and end days from your product, be sure to uncheck ‘Restrict start and end days’ checkbox, as your customers cannot book any days as none are selected.
ADVANCED SETTINGS
You can use these settings to further customise your booking availability. You can leave this section unedited if you want to use the default 1 week (7 day) availability. These settings are for advanced users with knowledge of booking systems and availability rules.
Minimum Booking Window
This is the minimum duration of time that a customer will have to book your next available product.
For example, if your minimum booking window is one month, then all bookable availability in the calendar will be one month into the future from the current date. If the current date was 1st March, the soonest any customers can book with you is 1st April.
Maximum Booking Window
This is the maximum duration of time that a product can be booked for.
For example, if your maximum booking window is twelve months, then all bookable availability in the calendar will be up to twelve months into the future from the current date. If the current date was 1st March, the furthest into the future any customers can book with you is 28th February the following year.
Adjacent Buffering
If you prefer to add a buffer before and after your appointments, tick the Adjacent Buffering checkbox. This option adds the specified buffer block both before and after each booking. Defining a buffer period of one day between booking with adjacent buffering will create a 2 day buffer between bookings.
All Dates Are
These rules affect how booking availability works.
- Available by default: By default, all bookable blocks are available to book; however, you can utilise the availability range to filter out days you are unavailable
If you are available 50 weeks of the year, you can leave as available by default, and select the dates you are not bookable.
- Not available by default: By default, all bookable blocks are unavailable and can’t be booked; utilise the availability range to pick your available hours and dates
If you are only available a few weeks in the year, it is easier to select not available by default, so every day is set to unavailable, and set up your availability on the day you are bookable in the availability range below.
Checking rules against
You have two options:
- All blocks being booked: This checks all available blocks within a booking duration (Default)
- Starting block only: This checks the first block the user selects. For example, if a customer books for 7 days and 1 block is equal to 1 day, it will only check availability on the first day.
Set Availability Range
Define bookable and non-bookable dates in this section. Enter the dates you need and the availability you want. If you’ve set availability to not available by default, set Bookable to yes, and if you’ve set availability to available by default, put Bookable to no to block out dates.
If you are using our default availability settings, use this section to block out any dates that are not available to customers.
Advanced Customer Settings
Use these settings to change how customers interact with your bookings. Again, we have set these up for you, but you can customize to suit your needs.
Requiring Confirmation
If you would like to review a potential booking before payment and confirmation, tick this checkbox. Rather than take payment at checkout, the user enters their details and submits them for approval.
After you authorise the booking, the customer will receive another email with instructions on how to pay.
Allowing Booking Cancellation
You have the option of allowing customers to cancel their reservations.
When you pick Can be cancelled?, two fields appear, allowing you to specify how many minutes, hours, days, or months ahead to the start date clients can cancel a booking.
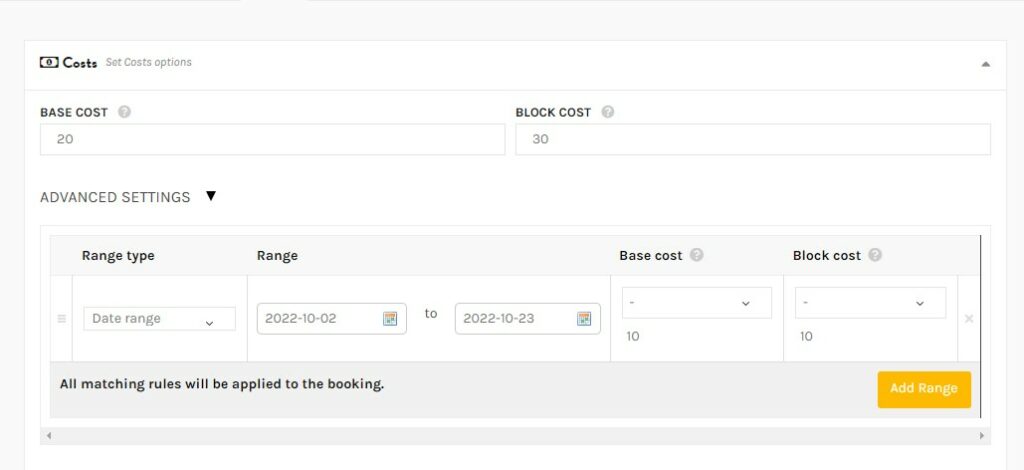
Costs
COST SETTINGS
You can organise your costs in one of two ways. You may either leave the costs section blank and put all costs in the ‘Resources’ section (see below for more information), or you can set your base and block costs and add additional costs to ‘Resources.’
Base & Block Costs
- Base cost: The base cost is applied regardless of a customer’s requirements. This could, for example, be the expense of installing an advertisement for a billboard. Leave this blank if there is no fee to be paid.
- Block cost: The actual cost per booked block.
ADVANCED SETTINGS
Use this feature to raise or lower costs throughout the year. If you charge more during specific months of the year, your additional charges will be applied automatically. Simply schedule in your dates and charges. We go through this in further detail in our Custom Costs Range article here.
- Enter your date range
- Use the drop-down menu to select + or –
- Enter the value you want to add or subtract from your product price
Extra Options (Resources)
Check the has resources box if you want to apply resources. Resources are variations of your products. You can create multiple resources and add them to a product for your customers to choose from and book under one listing.
Read our Booking Resources article here to find out more.
Additional Resources
Label
Enter the name for the drop-down selection box. For example, if you sell various digital advertising screen slots, you may use the label Screen Time.

Resources Are
There are two types of bookable resources:
• Customer selected: On a booking form, the customer can select which resource from a dropdown menu
• Assigned automatically: If a resource is available, it will be assigned to a customer booking automatically
Add/Link Resources
You can create resources in the resources tab. Here is our guide to Booking Resources.
If you have already created your resources, simply use the drop-down menu to select your resource, then click the ‘Add/Link resource’ button to link it to your product and enter the costs associated with it.
You may either leave the costs section blank and put all costs in the ‘Resources’, or you can set your base and block costs and add additional costs here.
Shipping
Shipping and Tax
Most bookable products do not require shipping, so you can skip this section if this is the case.
Check the ‘This product requires shipping’ checkbox if you require shipping.
Here you can enter the shipping details for your products that require shipping.
Shipping and tax can be set up in your store settings that are automatically applied to all your products if the check box This Product Requires Shipping is ticked. Find out more about setting up your shipping here.
Alternatively, you can override your default shipping by selecting the check box and entering your shipping fees.
Other
Inventory
What is SKU?
SKU stands for Stock Keeping Unit. It should be a unique set of characters that will not match any other product. Advercado will automatically assign a unique stock number to your product. If you want to create your own SKU unit characters, enter them in the SKU field.
Enable Product Stock Management
If you enable stock management and enter 10 in the stock quantity field after 10 units are ordered, this product will show a message that all the quantities are sold, and there is none in stock.
However, you may want to take some pre-orders before your next batch comes up. So you can Allow Back Orders to let the customers place orders even if the product is out of stock.
Product Status
Select ‘Online‘ to make the product available, or ‘Draft‘ to keep it offline.
Visibility
The visibility option defines the privacy of the product. By default, ‘Visible’ is selected. But if you want the product to only appear on the category listing page, search results, or want to list as a hidden product, then you can select the option, respectively.
Purchase Note
Include a friendly message and any further information that your clients will need when they purchase your product.
You can add further notes to an order once a customer has purchased your product. More information on this can be found in our Communication with customers article here.
Not what you are looking for?